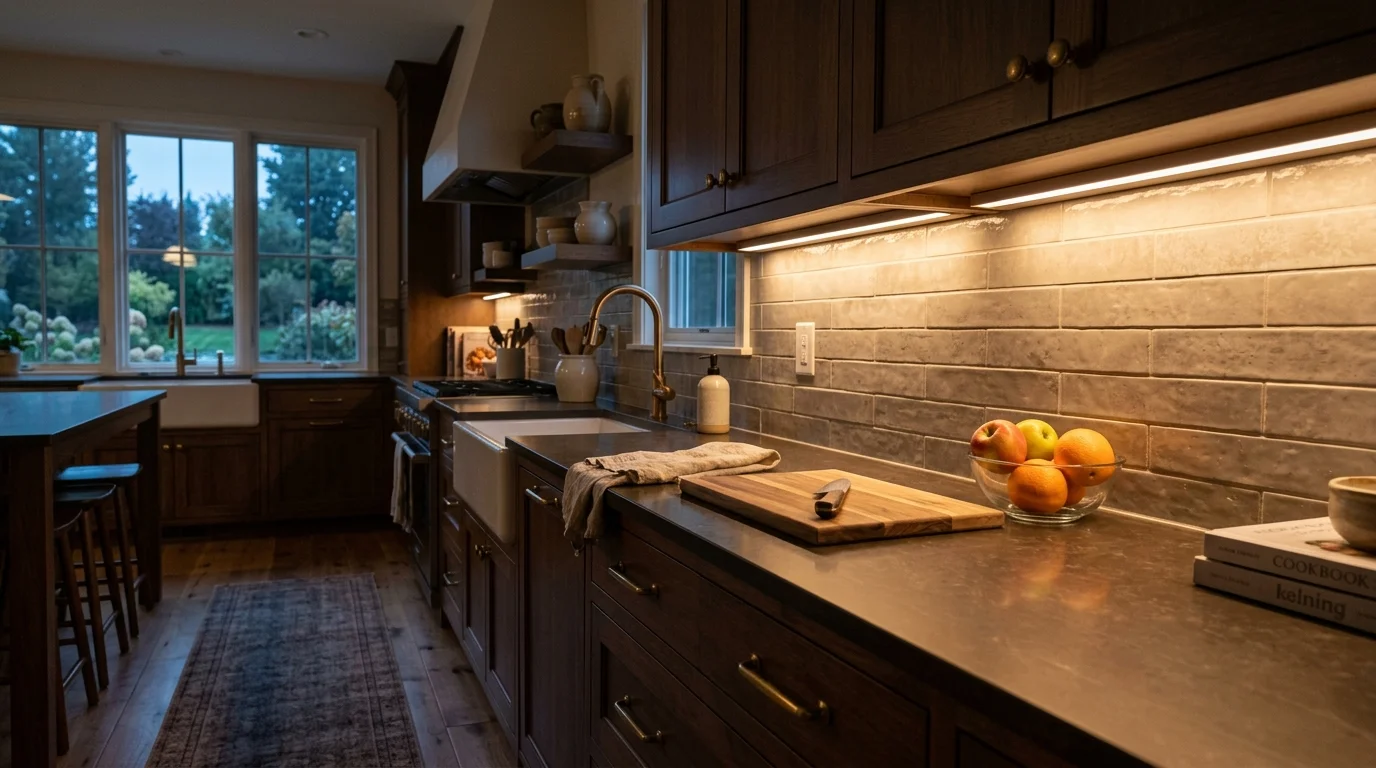
Under cabinet lighting helps when countertops stay dim beneath bright ceiling fixtures. It places light closer to the work surface and limits shadows from people or upper cabinets. The important choices are fixture shape, light color, dimming, and power.
A spec worksheet before you pick a finish
Shop the product sheet, not the Amazon title. EPA’s ENERGY STAR lighting specifications treat an under-cabinet luminaire as a fixture installed below an upper cabinet to light a counter or desk. Older ENERGY STAR solid-state criteria for residential under-cabinet kitchen lighting asked for at least 125 lumens per linear foot. ENERGY STAR downlight criteria still define color: CCT in Kelvin (2700K to 3000K reads warm, 4000K and higher reads cool) and CRI (Ra) of at least 80, with R9 greater than 0, for certified downlights. Use those same color fields when you compare tape, puck, and bar lights, even if the under-cabinet SKU is not an ENERGY STAR downlight.
DOE’s Building America lighting guideline, summarizing IES residential targets, puts a prep counter around 50 footcandles. Under-cabinet lighting is the layer that usually hits that work plane. Recessed cans and pendants should not be asked to do it from the ceiling.
Fill this worksheet for every cabinet run. Leave a cell blank when the cut sheet does not answer it.
| Spec | What to record from the cut sheet | Why it matters |
|---|---|---|
| Output | Lumens per fixture or per linear foot | Compare to the 125 lumens/ft ENERGY STAR kitchen under-cabinet starting point and to the IES prep-counter target |
| Color quality | CCT (Kelvin) and CRI (Ra, and R9 if listed) | Mismatched Kelvin splits the backsplash; low CRI muddies food color |
| Channel / diffuser | Extruded channel, opal lens, or bare tape | Bare dots glare on glossy tile and stone |
| Driver access | Remote or integral driver, and how you reach it later | A dead driver behind a finished cabinet is a service problem |
| Run length | Maximum series length and voltage drop notes | Long galleys often need a second feed, not a longer strip |
| Voltage | Line voltage vs 12V or 24V low-voltage | Mixing them is how dimmers misbehave |
| Dimming protocol | Phase, 0-10V, or the listed compatible dimmer | “Dimmable” on one box is not a system match |
| Warranty | Years, indoor listing, and who honors it | No brand endorsement without the current sheet |
Illustrative fixture schedule
This schedule is a planning example. Measure the real cabinet bottoms before anyone orders.
| Run | Measured length | Fixture type | Output to confirm | CCT / CRI | Power and dimming | Driver access |
|---|---|---|---|---|---|---|
| Sink wall | Tape the clear underside | Linear bar or taped channel with diffuser | Manufacturer lumens/ft | Match adjacent recessed lights | Listed dimmer family | Remote driver in an accessible cabinet |
| Range wall, split by hood | Two shorter runs, not one strip through the hood | Same family as the sink wall | Same output family | Same Kelvin | Same control zone or a separate prep zone | Keep connections off the cooking surface |
| Desk or appliance garage | Short bar or pucks | Lower output if it is display, not prep | Confirm on the sheet | Same Kelvin unless the designer wants a split | Separate switch if it is not task light | Access without unloading the garage |
Electrical requirements stay project-specific. Current California circuit, GFCI, AFCI, and lighting-control rules could not be confirmed here. The electrician applies the requirements in force for the address.
Why under cabinet light matters more than ceiling light
Ceiling fixtures light the room from above. Your body can interrupt that light while you chop, measure, or clean. Upper cabinets also create a natural shadow line across the counter.
Under cabinet lighting changes the direction of the light. It illuminates the backsplash and counter from close range. That difference can make tools, ingredients, and surface edges easier to see.
It also creates a separate mood after dinner. You can dim the counter layer instead of lighting the entire kitchen. The result often feels softer from an adjoining dining or living area.
Layout matters more than the number of fixtures. A City Heights galley and a Chula Vista island kitchen need different mockups. The galley may have long upper-cabinet runs on both sides. An island may have no upper cabinets above its main work area. Under cabinet lighting only helps where cabinets provide a mounting surface.
Start by marking the counters you use every day. Note sinks, cooktops, coffee stations, corners, and appliance garages. Then look underneath each cabinet. Cabinet dividers, trim, outlets, and changes in depth can interrupt a planned light run.
Test the view from nearby rooms, too. A fixture hidden from standing height may be visible from a breakfast chair. Glossy counters and polished backsplashes can also reveal bright dots or reflections.
These details are easier to solve before installation. Our kitchen electrical and lighting service connects San Diego County homeowners with licensed, independent local pros who can assess the room and proposed lighting plan.
Tape, puck and linear bar compared
Tape, puck, and linear bar lights produce different visual patterns. None is automatically right for every kitchen. Compare them against your cabinets, backsplash, counter finish, and preferred level of fixture visibility.
Tape lighting uses a narrow, flexible strip. It can follow long cabinet runs and turn through some layout changes. A channel and diffuser can help conceal the strip and soften visible points of light. Ask whether those parts are included, because the finished appearance depends on the complete assembly.
Tape deserves careful planning around corners and cabinet breaks. A single straight run may not fit around a hood, sink window, or appliance garage. Connection points and power components also need planned locations.
Puck lights create separate pools of light. Some homeowners like that rhythm, especially inside display cabinets or beneath short cabinet sections. Others prefer a more continuous wash across the backsplash. Place temporary samples before committing. The spacing that looks balanced on paper can feel different over the actual counter.
Pucks also have a distinct physical shape. Check whether the cabinet’s lower trim hides them. Then sit at the island or dining table and look back toward the upper cabinets. That angle often reveals more than a standing inspection.
Linear bars are rigid fixtures with defined lengths. They can suit straight cabinet runs where a clean, repeatable fixture is wanted. Measure every usable section separately. Cabinet boxes that appear equal from the front may have different obstacles underneath.
For all three styles, inspect a working sample. Look for visible dots, sharp reflections, dark gaps, and fixture glare. Test it over the real tile, paint, wood, or countertop sample. Product photographs can’t reproduce your room’s exact surfaces.
Also confirm how separate sections connect. Ask where cords, connectors, switches, and power components will sit. The fixture is only one part of the finished installation.
Color temperature and dimming
Color temperature affects how the kitchen feels and how its finishes appear. Warm light can support an intimate evening setting. A more neutral appearance may feel clearer during food preparation. Cooler-looking light can feel stark beside warm wood or cream-colored surfaces.
Labels alone aren’t enough. Two products with similar descriptions can still look different to your eye. Compare operating samples together, preferably beneath the actual cabinets. View them during daylight and again after sunset.
San Diego kitchens can have very different daylight conditions. A west-facing coastal North County window may change the room throughout the afternoon. An enclosed East County galley may depend more heavily on electric light. Test the planned fixture at the times you normally use the kitchen.
Match adjacent lighting deliberately. Under cabinet fixtures, pendants, and recessed lights don’t need to be identical. However, an accidental color mismatch can make one surface look divided. Bring samples of cabinet paint, wood, backsplash tile, and counter material to the comparison.
Dimming gives the lighting more than one job. Brighter settings can support preparation and cleanup. Lower settings can leave a gentle path through the kitchen at night. Before purchasing anything, confirm that the fixture, power component, dimmer, and control method are designed to work together.
Watch for the lowest dimmed setting during the sample test. Check whether the light remains steady and whether different sections dim together. Product compatibility should come from the manufacturer’s documentation and the selected professional, not a guess based on connector shape.
Decide where the control belongs before cabinet work begins. A wall control may fit one routine. A fixture-mounted control may fit another. Think about how wet, full, or messy your hands may be when you need it.
Hardwired versus plug in
A plug-in system draws power through a cord and receptacle. That can make the power path easy to understand, but the cord and plug may remain visible. It can also occupy a receptacle you use for a countertop appliance.
A hardwired plan connects the lighting through the home’s electrical system. It can produce a cleaner visual result because fewer components remain exposed. It also requires coordination around wiring, controls, cabinets, and wall access.
Choose based on the whole installation, not the fixture package. Begin with the desired appearance. Decide whether you’ll accept visible cords, where switches should sit, and whether power components can be reached later. A hidden component isn’t helpful if cabinet shelves must be dismantled to access it.
Existing cabinets may limit the available routes. New cabinets give the designer and electrical professional more time to coordinate openings and concealment. If lighting is part of a full kitchen remodel, settle the electrical plan before cabinet fabrication or ordering.
Permit requirements can depend on the project’s scope. This site’s verified sources don’t establish a kitchen-specific permit trigger for under cabinet lighting. For a property inside San Diego city limits, confirm the current process with City of San Diego Development Services. For Chula Vista, Encinitas, El Cajon, or another jurisdiction, check with the agency serving the property address.
Our guide to California kitchen electrical code considerations explains why current requirements need project-specific confirmation. It doesn’t replace an electrician’s assessment or direction from the local authority.
Don’t buy fixtures until the intended power method is clear. Otherwise, a visually suitable product may not fit the planned controls or available installation space.
What an electrician has to do
The electrician’s exact scope depends on the kitchen, selected fixtures, and existing electrical system. Ask for an on-site assessment before finalizing products. The goal is a written plan that identifies responsibilities and unresolved decisions.
Ask where the lighting will receive power. Confirm the proposed control location and how separate cabinet runs will connect. The plan should also identify where any required power components will remain accessible.
Cabinet coordination deserves its own discussion. Ask whether the installer expects openings through cabinet sides, bottoms, backs, or trim. Determine who will make those openings and who will handle visible finishing. Small misunderstandings here can leave a polished cabinet with an awkward wire route.
The electrician should also review the manufacturer’s installation instructions. Confirm compatibility among the lights, dimmer, controls, connectors, and power components. Keep product documentation with the project records.
Current California requirements for kitchen circuits, GFCI protection, AFCI protection, and lighting controls couldn’t be confirmed from the primary sources available to this site. We won’t prescribe those details. Ask the electrician to apply the requirements in force for your address and scope. The California Energy Commission is also an authority for current state energy standards.
Permit and inspection responsibility should be clear before work begins. Ask whether the proposed scope needs approval and which party will contact the local authority. Get that answer for the actual address, since San Diego County includes several separate jurisdictions.
Modern Kitchen SD is a referral service. We don’t perform electrical work, set prices, or provide warranties. We match homeowners with licensed, independent local kitchen remodel professionals. You can verify a contractor through the CSLB License Check tool. License status confirms legal standing, not workmanship, so review the complete proposal and product plan as well.
A useful final walkthrough should cover control operation, fixture access, and product documentation. Photograph concealed component locations before shelves are filled. Keep the model information where it can be found later.
When to call us
If the plan involves the home’s wiring, cabinet alterations, or a wider renovation, bring in a licensed kitchen remodeling pro before ordering materials. Call us at (858) 400-4623 and we’ll connect you with a licensed local kitchen remodeler.